Cyclone Guide Flare

Cyclone Restrained Guide must be modified

The following important points need to be considered when installing the HDF Restrained Guide. Firstly this extremely resistant roller shutter that has been tested for cyclonic conditions is only as good as the fixings that hold it to the wall. For cyclonic conditions this guide should be fixed at 300mm increments to a solid brick (cor filled) wall with a minimum of 10 gauge screws and a minimum of 50mm engagement.

For non-cyclonic conditions the fixing is not as harsh but should naturally be conducive with the requirements of the job. For all applications it is important that the following points be adhered to:

roller shutters

There is a witness mark on the face side of the guide. This is a small “V” groove that runs the length of the guide on the outside face. This “V” groove can be used as a drilling mark for on wall applications. However this mark is meant to clearly identify the outside face of the guide. The restrained guide has a thicker wall section on the outside face and this is why it is so important that it be fitted in the correct orientation.

The very top section of the guide must also be modified on site to allow the shutter curtain to enter the guide profile smoothly and without interference. The picture shows the required modifications that should be completed by the installer.

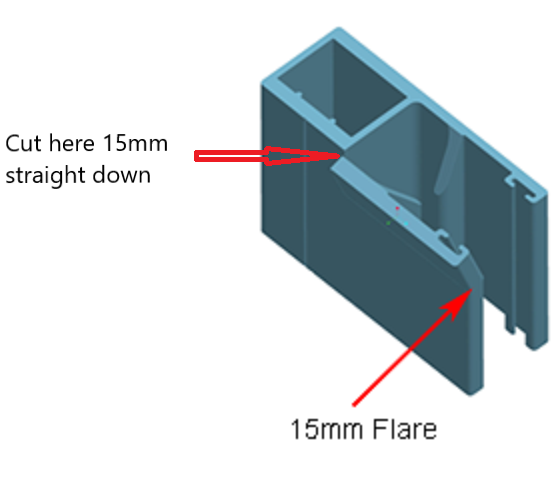
Cut down 15mm and flare the outside face of the guide 11mm out allowing for free entry of the curtain from the head box.

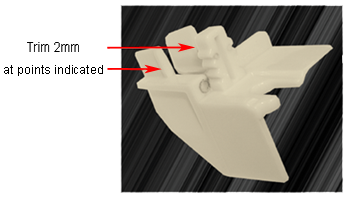
File, grind or cut the internal webs at the top as shown to allow free unobstructed flow of the curtain into the guide.

Please Note: When making the 15mm Flare, use thick cardboard to protect the surface of the guide, from being scratched by the vice grips.

The Standard Box End Insert also needs modification.
shutter64

The insert guide entry lips require 2mm to be trimmed off of the inside using tin snips or another suitable tool, to allow for the restrained slat insert-restraining lug to enter the guide unobstructed.